Introduction
While the core content of my motion capture drones project is on the YouTube video, I thought I should create a blog post with some additional details and my own thoughts on the project. If you haven't watched the video do that first, it covers all the fun stuff.
Github Repo: github.com/jyjblrd/Mocap-Drones
Motivation
Like most of my projects, I ended up doing this just because I thought it would be really cool. There are so many incredible videos of drone swarms on YouTube, but they all used motion capture setups that cost tens of thousands of dollars. I thought it would be fun to try create my own indoor drone swarm, so I started looking for open source motion capture systems. There are a ton of single camera motion capture systems for humans (mostly developed for v-tubers? seriously haha), but shockingly little work done for robotics motion capture. There is one video from a few years ago which shows a similar PS3 eye motion capture system used for humanoid tracking, but the creator seems against releasing the source code which is a shame.
So yeah, this project is an attempt to fill the void of open source motion capture systems. I decided to fly drones with it as a flashy demonstration of what kinds of things it can be used for; it's a nice way to wrap the project up into a cool real world demonstration that grabs people's imagination – something which I feel more open source projects should do!
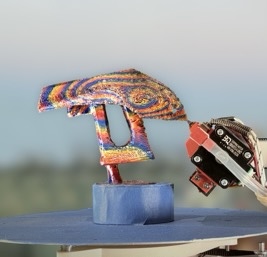
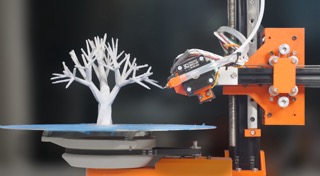
The Drone
I've gotten a lot of questions about the drones I used in this project, which I guess should be expected since they are the (visual) star of the show!
Initially, I looked into buying off the shelf researched focused micro drones, like the CrazyFlie or EspCopter, but they all were quite expensive. In the low-cost spirit of this project, I decided to build my own mini drones.
I considered using something like the ESP-Drone, which can be bought for really cheap online. However, that would require developing / adapting flight controller software to run on the ESP32, which I knew would be a project in its self. I instead decided to just build a small drone with an ESP32 emulating an RC receiver. This solution is nice because it also allows my system to be used with any drone and flight controller.
Below are the parts I used to build my drone:
| Device | Price | Name | Comments |
|---|---|---|---|
| Flight controller | $23 | F3 EVO Micro Brushed Flight Controller | Running BetaFlight |
| Frame Motor & Props | $13 | Generic 95mm brushed drone frame, 8520 brushed motors, 55mm props | |
| Battery | $5 | YDL 18350 | 1100mah, 9A |
| Battery holder | $0.5 | 1S 18350 battery holder | |
| IR markers | $0.1 | 3mm IR Led | You need to sandpaper the surface so they emit light evenly, instead of just up |
| ESP32 receiver | $4 | WEMOS D1 Mini ESP32 USB-C |
- Total cost: ~$50 USD
- Flight time: ~10min
- Thrust/Weight: Very shit lol. Maybe 1.5?
The flight controller had to run some ancient version of BetaFlight since it has the old f3 microprocessor, but for what I'm doing that was totally fine.
The LEDs are attached to the drone using stiff wires, which also carry the power. The whole drone was surprisingly crash resistant, it probably crashed over 100 times but the thing is so light and the props are so small that it never really broke. The weak point is definitely the brushed motors, which give out after a few hours of flying. It probably didn't help that I bought the cheapest, shittiest brushed motors I could find on Aliexpress lol.
If I decided to fully commit to making a drone swarm, I would definitely use the esp-drone platform. It would be a pain to get flying, but it would cut out so many components from the system since the ESP32 would both wirelessly receive messages and control the motors. It would literally just a flying pcb, so it should be able to get really good flight times.
Cameras
In the video I kinda breezed over a lot of the details of the cameras, but there is a fair bit of nuance involved to convert the PS3 eye cameras to the infrared cameras I used in this project.
There are two options to doing this:
Option 1: Use the original lens
This is what I did.
Pros:
- No extra hardware needed
Cons:
- Not all PS3 eye cameras can be converted using this method
- Quite difficult and finicky
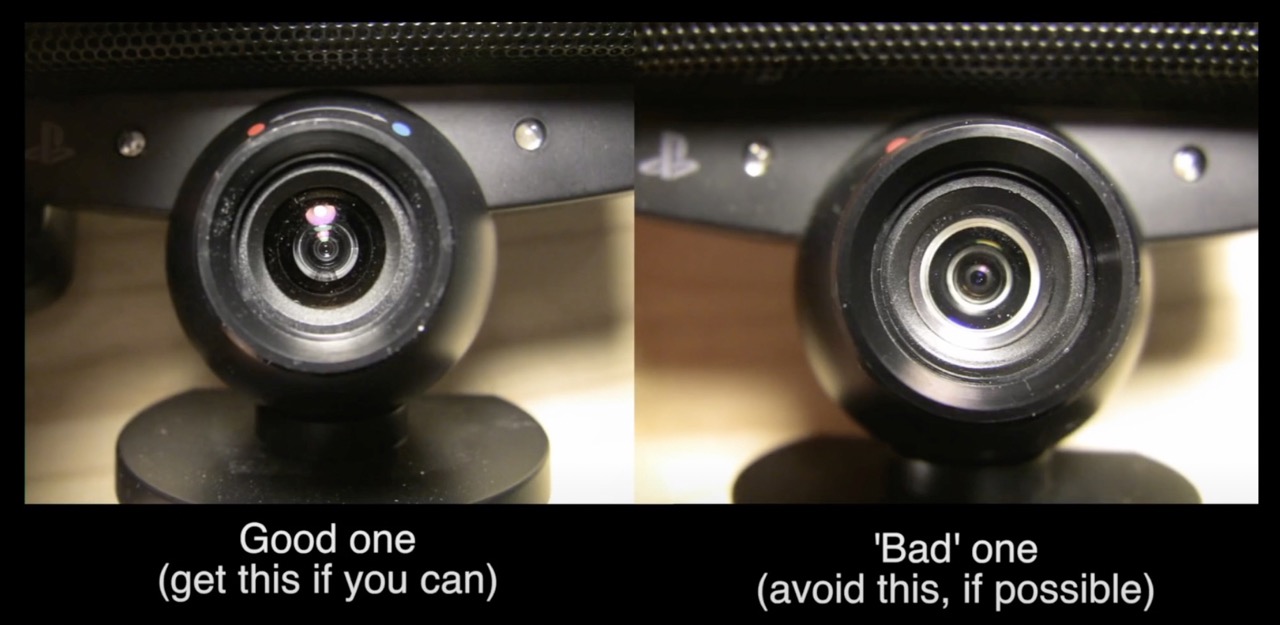
The biggest downside of this method is that it doesn't work for all PS3 cameras. Only the "old" type of PS3 cameras that have a curved front lens element and no white ring inside the lens can be used. This is really annoying because you often can't tell if a camera is the new or old type when looking at ebay listings, etc. I just bought 8 cameras for $1 each, and 5 of them ended up being the correct type.
Here are the steps:
- Remove the outer plastic shell
- Unscrew the lens mount
- Use a small sharp knife or soldering iron to cut around the pink IR cut filter inside the lens. Don't just shatter the glass, cut around it and pry it out. This will take a while (it took me like 30min my first time).
- Removing the IR cut filter changes the focal length of the lens, so we need to make the lens closer to the sensor for the image to be in focus. Use course sandpaper or a file to file down the lens mount by a small amount, checking every few minutes if the image is in focus or not. If you file away too much, you can use a piece of tape or something as a shim. The sweet spot is a fraction of a mm, so be careful. If you don't do this step your images will be out of focus!
- Glue the floppy disk IR filter on the outside of the lens
There are tons of tutorials online, this one is pretty good.
Option 2: Use a new lens
I didn't do this, but if I were to do it again I would definitely do it this way. I don't see any reason why it won't work.
Pros:
- Much easier and faster to do
- Any PS3 eye camera can be used
Cons:
- Requires you to buy a new lens
Basically, instead of going through the hassle of removing the IR cut filter from the original lens and filing down the mount, just throw away the original lens a put a new one on. The new lens needs to have a reasonably large field of view and no IR cut filter so it can let IR light through. These types of lenses are often marketed as "night vision" security camera lenses or something like that. You also need to buy a lens that has the correct mount to fit on the PS3 eye PCB, or just 3D print a mount.
Here are the steps:
- Remove the outer plastic shell
- Unscrew the lens mount
- Screw on the new lens mount
- Glue the floppy disk IR filter on the outside of the lens
Wow, that was easy.
This discussion post on GitHub by gumby0q gives his instructions on how to do this.
PS3 eye shutter sync
Another reason why the PS3 eye is great for this application is because you can physically sync all the camera's shutters, so they take pictures at the same time. The shutter sync signal wire can be found on the PCB (google it for details), and then you can pulse a sync signal to all the cameras. My camera case has space for a 3.5mm jack which can be used to daisy-chain the camera's shutter sync signals together.
I didn't actually end up using this feature, however. The signal wire on the PCB is really hard to find, and is in different places depending on the camera iteration. I also got some weird artifacts when using the sync signal, and I didn't really notice an increase in accuracy. I think that the low resolution of these cameras (320x240) and relatively slow speeds of the drones means that the impact of shutter syncing is pretty negligible. If you pushed the system up to 150fps and had fast moving objects, the shutter sync pulse would probably be very useful.
Building the rest of the camera
We also need to 3D print the case and swivel mount for the camera. You can find the files on the GitHub repo.
Here are a list of parts I used to build the camera:
| Device | Price | Link |
|---|---|---|
| PS3 Eye | $1 | CeX |
| IR Ring Floodlight | $0.9 | Aliexpress |
| 5m USB Active Extension Cable | $4 | Aliexpress |
| 3.5mm Jack Plug | $0.2 | Aliexpress |
| 3m 3.5mm Extension Cable | $1 | Aliexpress |
The 3.5mm jack and extension cable are only needed if you want to sync the shutters.
Conclusion / Rambly Reflection
This project worked out really well – I'm kinda blown away by how accurate it ended up being. I still can't believe that there isn't any big open source motion capture system, at least none that I've seen so far. It kinda ashames me that my shitty undocumented code is like the most starred non-humanoid motion capture repository under the "motion-capture" tag on GitHub.
I briefly mentioned this in the video, but I was also working at Palantir this summer as an intern. I had an amazing time working there, I mean they had three free meals a day, unlimited alcohol, drinks and snacks – what else could you ask for. The combination of loving your job and free food is a dangerous one, as I would literally stay for dinner every day (I made up for this by coming in to work later than I probably should have lol). Unfortunately, this didn’t give me much free time to work on my drone project, but that didn’t really stop me.
Most days would be 10am-6pm at Palantir and then 7pm-2am working on my motion capture drones (thankfully I lived 10min from work). It absolutely wasn’t a healthy work-life balance, but that’s the downside of loving coding. From an outside perspective, I can see why it could look pretty sad to spend most of my day writing code, but I guess I do it because I really do love it. Just as some people watch Netflix, crochet or play video games to unwind after work, I like to code. Which is a bit confusing because I also write code for work, but I guess I'm just very lucky.
However, even I have a limit to how much programming I can do before losing my mind. I was definitely feeling pretty burnt out by the end of my 3 month summer, causing me to slow down on the drone project and focus more on work and simply relaxing. Uni started the Monday after I finished my internship, so that definitely was the right call as Cambridge terms are notoriously flat out.
It is nice to have worked on a proper coding project after years of film photography projects, my website was becoming a bit overrun with them haha